Enrica Dray Origami Star
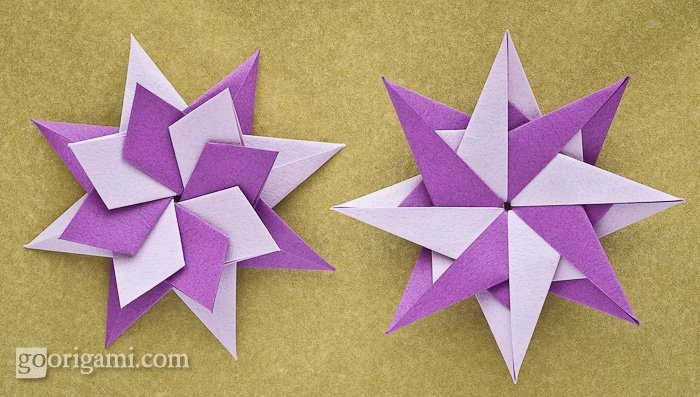
It seems I can’t resist any origami star that comes in my way. This one was designed by Enrica Dray, and it’s absolutely beautiful!
Don’t miss the link to the tutorial on this star below.
| Name: | Origami Star |
|---|---|
| Designer: | Enrica Dray |
| Units: | 8 |
| Paper ratio: | square |
| Assembled with: | no glue |
| Paper size: | 5 cm |
| Model size: | ~ 7 cm |
| Paper: | Tant (Japan) |
| Diagram: | Enrica Dray Star – unit |
| Assembly: | Enrica Dray Star – assembly |
Putting the last unit in place is a bit of a struggle, but it’s totally worth it. And to make assembly easier on the first steps, slightly unfold all units and follow these instructions (clickable):

You can also try a curled variation of this star – gently pull the layers of paper in the center from underneath and curl them with a wooden skewer or toothpick, and voilà! Your star is ready to shine!


Tags: Enrica Dray, Star

this.looks.and.is.hard.
Who said origami is easy?:) It’s not.
That’s true!! Maria..this is an amazing website and your designs are great!!
origami is easy sometimes
You should start with what you can handle and build up to the harder ones
Thanks so much for the photo tutorial! Nice to have instructions for one of Enrica’s designs. These are pretty!
Thank you for sharing! Beautiful gallery!
the pictures for folding, but the pictures for putting them together are very unclear to me. You say loosen fold – which folds, then put inside with the arrow pointing to the right – but mine wont go to the right. Where does the valley fold go, and what do you fold back behind? If i just placed the left side of piece I am placing into the left side of other piece and continue around, I got the star to look like the one in photo 2 (the photo on the right, before the how to assemble pictures. I don’t have a clue how to make it look like any of the others. This is a beautiful star and I appreciate you sharing it with us. I just wish I could understand the putting the modules together better
I googled this star and found your picturial on flicker for putting the modules together, these pictures were great, and even though it was still hard for me to figure out (user trial and error), i was able to figure it out. and I wouldn’t have with out those pictures. Thanks a ton =]
The pictorial you found is probably by Robin Scholz, not mine. Anyway, I’m glad you figured it out Rebekka! :)
Instructions are excellent, such an easy model and yet So Dramatic. When I realised that one should assemble counter clockwise it was simple and the last step was easier when you use a scewer, or toothpick to lift the last flap….
Oh yes, the last unit was the toughest! I used a toothpick too.
The flowers are beautiful, but I’ll start from something easier. It is too difficult for me.
so cool! thank you!
Hi,
is there something different to do when assemblying the last part, I am just not capable of doing it right…anyone knows of a completed tutorial who guides through the whole process? Thanks!
Hi! Thanks for this tutorial! I used it to make earrings you can see at http://munuputum.canalblog.com/archives/2013/04/26/27015372.html
Thanks for the pictures and tutorials. Between all of them, I did figure out how to assemble the star. Well worth the first rumpled version to get it right. Once you “get it” it’s a snap to make these.
Can you pick a video please?
Ładnie wykonane :)
Bonito lindo maravilhoso
no entendo nada !!
I can’t seem to find the instructions for folding the modules, only the assembly instructions
Hi Bella!
To learn how to fold the unit follow these instructions here:
https://www.flickr.com/photos/50612995@N02/6543158731/in/photostream/
Origami can be easy it just takes practice
Really beatifull! Thanks you very much for your generosity to share the step to step of your creation. Regreats from Tucuman, Argentina
i love it!!! It is so beautiful, but unfortunately i don’t know how to make it..