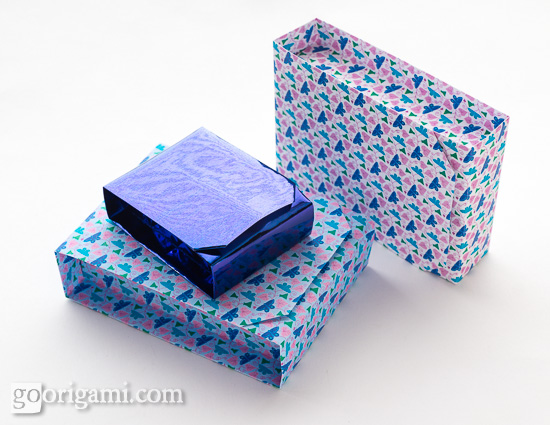
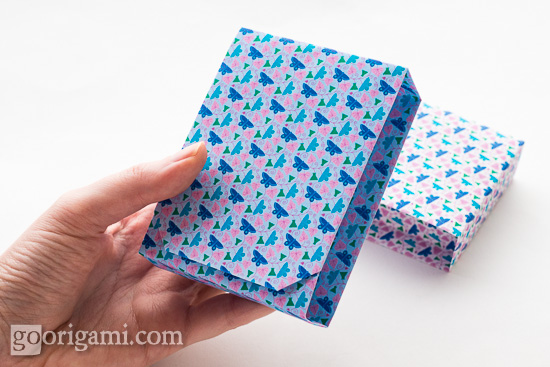
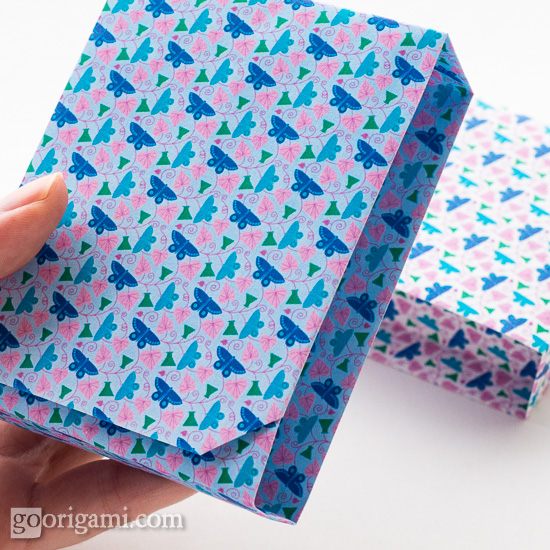
BoxInABox — Origami Box by Akiko Yamanashi
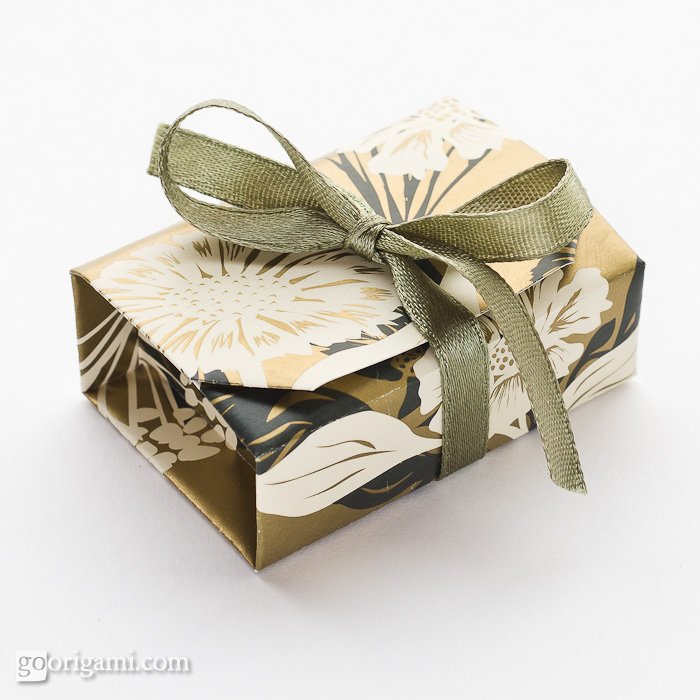
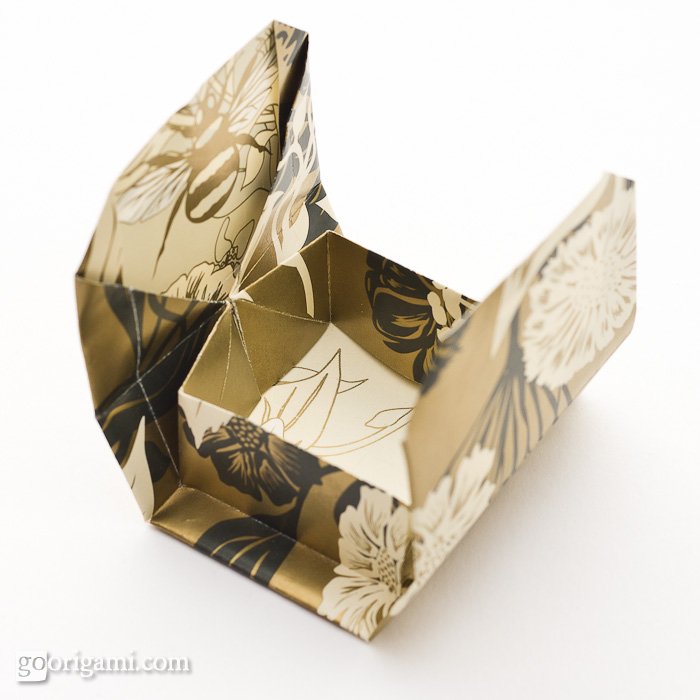
I came across a tutorial for this origami box yesterday and couldn’t resist folding it immediately! It’s not like any other box I’ve folded before, it appears to be a rectangular box from outside but when you open it up there is another box inside – a square one! It also has a lid which closes down very tightly.
The box is made out of a single square sheet of paper without scissors or glue. A sheet of scrapbooking paper will be probably the best choice for this box. Find out all the details and a link to the tutorial below!

| Name: | BoxInABox |
| Designer: | Akiko Yamanashi |
| Paper ratio: | square |
| Paper size: | 15 cm |
| Model size: | ~ 2 * 4 * 5.5 cm |
| Paper: | Double-sided wrapping paper |
| Diagram: | Tutorial by Michila Caldera |
| Video: | Video Tutorial |
| Paper size: | 30 cm |
| Model size: | ~ 4 * 8 * 11.5 cm |
| Paper: | Scrapbooking paper |
UPDATE from 13.09.2013:
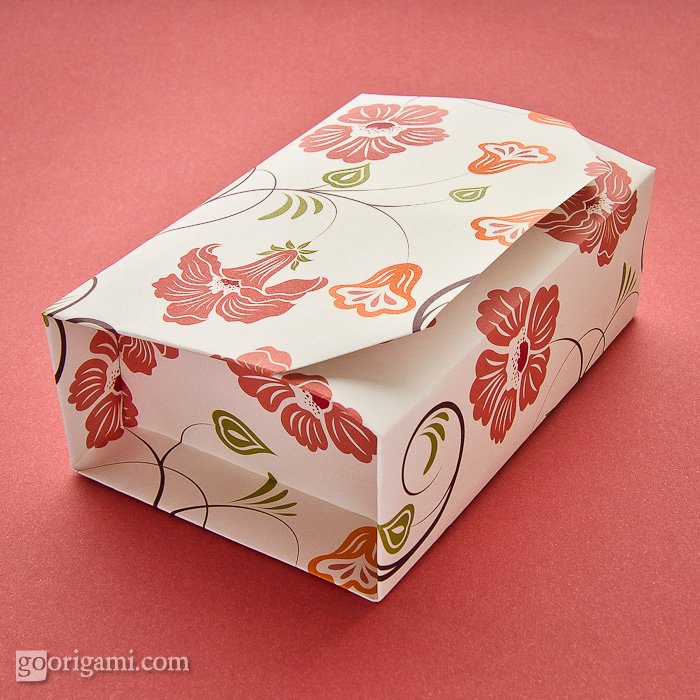
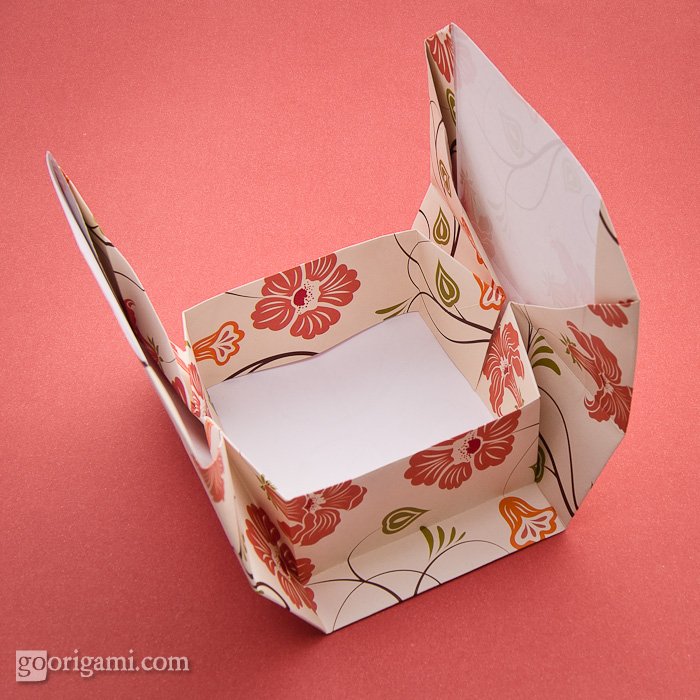
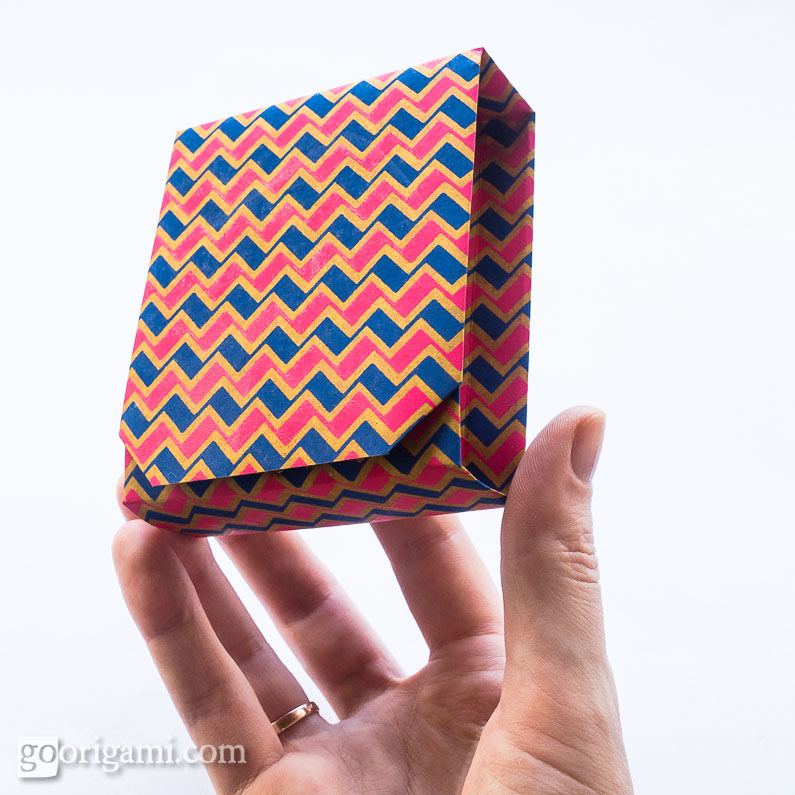
As it turns out, you can make this box not only from a square but from a rectangular sheet, too! Check out the link below to the tutorial by Carla Onishi de Godoy who modified this design to A4 paper. Letter sized paper will work as well!
Oh, and just a small piece of advice – on the first step don’t crease the sheet in half all the way from edge to edge, just make a short pinch somewhere in the middle. We don’t want an unnecessary crease running right on the top of our pretty box, do we?
| Name: | BoxInABox – adaptation to A4 paper |
| Designer: | Akiko Yamanashi – original design, |
| Carla Onishi de Godoy – adaptation | |
| Paper ratio: | rectangle |
| (A-paper, letter sized paper, 2:3 rectangles, etc.) | |
| Paper size: | A4 sheet |
| Model size: | ~ 2.5 * 8 * 11 cm (outer size) |
| Paper: | Printable origami paper by Leyla Torres |
| Diagram: | Tutorial by Carla Onishi de Godoy |
A box folded from a letter-sized sheet:
Tags: Akiko Yamanashi, Box, Carla Onishi

This is such a useful and pleasantly shaped box! Self closing too. Not very difficult either, came out right the first time…
Its wow. Can u pls let me know where I can find the step by step instructions to creat this. I want to make this box during Christmas. Thank u.
There is a link to the step-by-step tutorial in the post! Enjoy:)
Step-by-step video tutorial: http://www.youtube.com/watch?v=b5epO1VbqME
The uploader also has printable instructions on their blog aychessekaye.com
Did you notice how this person put her own name on every page of the tutorial but forgot to mention the name of the original creator, Akiko Yamanashi?))
No credits in the video either.
The box looks so beautiful! I’m a beginner – is there a site you could recommend that would explain the cupboard fold? I’m used to the very easy diagrams that show fold lines, start from the beginning, etc. This is outside of my skill level as it is, but would be perfect for christmas presents I’ve made. Thank you!
Yes, sure! For all base folds have a look at this site for example!
https://www.oriland.com/oriversity/main.php?base_folds
The tutorial for the box might be not very easy for a novice to follow, but I hope you manage to work it out! If some steps are unclear just look ahead at the next step to see how the result should look like.
This is beautiful, and looks so simple! I’m off to try it now!
I wish I could try my hand at this project, but the tutorial is really just some photographs that provide very little information for a person with little experience folding origami. Had the steps to the cupboard fold been shown or even had I been given more detail than just the words “cupboard fold” under a piece of paper with a lot of creases in it, I might have given it a shot. However, that was the first step! From the looks of it, the creases that are not explained seem to be very vital to the construction. Overall, this was quite disappointing as the little box is lovely, and I feel the project would be fairly simple if the tutorial was actually a tutorial. I do thank you for sharing such a cool project, and I don’t fault you for someone else’s abbreviated pictorial representation masquerading as actual instructions!
The only problem with this tutorial is that it’s made not with a new sheet of paper but with already folded and then unfolded box. That’s why you see all those creases on the very first photo and it might be confusing of course. All you have to do is to pretend that you don’t see those lines:) Cupboard fold looks like a square with two opposite sides folded to the center, nothing else. Just grab a sheet of double-sided paper and follow the instructions step by step (if something is unclear look ahead at the next step) and I bet you’ll figure it out!
The link is above but here it is again
https://www.youtube.com/watch?v=Yd6BLB9tT9k
you don’t have to use the tutorial on this site, you can find one on you tube that explains it step by step.
Do you have to fold cupboard folds in both directions? I love the box. Still working on your tutorial trying to get it. Thank you Maureen. I am determined to get it right!
In the first step just make a cupboard fold in one direction.
I’ve diagrammed a few first steps, hope it helps!
Thank you Maria I will try tonight.
Thank you very much, I did fold the box I really like it!
I used foil and it looks nice. Thank you again Maureen.
Great! Congratulations!
Hi Maria!
I’ve had a great time this evening exploring your blog. :-) I particularly like the stars you have designed! The purple and white ones are my favorites.
And I couldn’t wait to try this lovely and brilliantly designed BoxInABox. Thank you so much for sharing the tutorial. Boxes are my favorite models to fold, and I’m always looking for new ones. I’ve finished my practice box; now I’m going to get out the fancy paper! :-) Thanks again.
~ Kate
Not the easiest instructions to follow when the example has already been folded. The later few images were a much better help but still confusing because there were only 6 steps on that one…
Ok…..I tried but got stuck at the end. I am a total novice, so……I am not blaming the directions for my lack of experience. But, I was determined to figure this out and finally found this tutorial on youtube. I did it!!! Hope this helps:0https://www.youtube.com/watch?v=Yd6BLB9tT9k
Thank you Julie – that’s a good tutorial! I updated the post with your link.
Hi Maria
i will kiss your nice hand for your nice work ;)
Thank you Mohsen! You’re too kind:)
After I learned this box here, it definitely became one of my favorites boxes!! Thank you so much, Maria!!!
Great tutorial!
I tried with letter-size paper, it failed. Then I cut a letter-size to make 2:3 ratio, It worked! Seems this method works only in 2:3 ratio paper. The produced inner box will be 2:5 ratio which is good for long items.
Thanks.
Hi Jacob! I just tried to fold it from a letter-sized paper ( 8.5 by 11 inches) – worked as a charm! Hope I’ll be able to post a picture tomorrow.
I was just sharing links. I personally found the printable instructions really helpful and she has every right to put her name on something she has taken the time to put togther, but you should message her directly if you dislike it. And to be fair, I did find this post where she does mention the creator.
Gwen,
Are you forgetting that the original creator also has the right to *keep* their name on their work?
I think you are absolutely correct in saying the Youtube video maker has a right to put her name on her own work. Personally, I wouldn’t want it any other way!
However, in cases where someone is using the work of another as a base, claims to whatever ‘rights’ they feel they have also include the responsibility to mention the original creator of work if known, and not take credit for *their* work. If nothing else, this is simply reasonable courtesy. :-)
The real question here is: Why would she *not* mention the creator, and therefore link her helpful instructions forever with any mention of that person through tagging? The exposure then has the possibility of becoming exponential.That is one advantage of the net.
I think you can see how some people might think it was because she wanted all of the credit for herself.
Thanks for this post, Maria! I don’t usually have time for much folding – but this was a blm to my origami loving soul. I really appreciate your time and effort. :-)
Neither the video, nor the web/image tutorial exist anymore. What a let down. I was really excited about this one!!
Here are photo instructions http://www.origami-instructions.com/origami-box-in-a-box.html. Additionally, you can google box in a box origami for video instructions. Please enjoy!